Modules from CFEngine Build
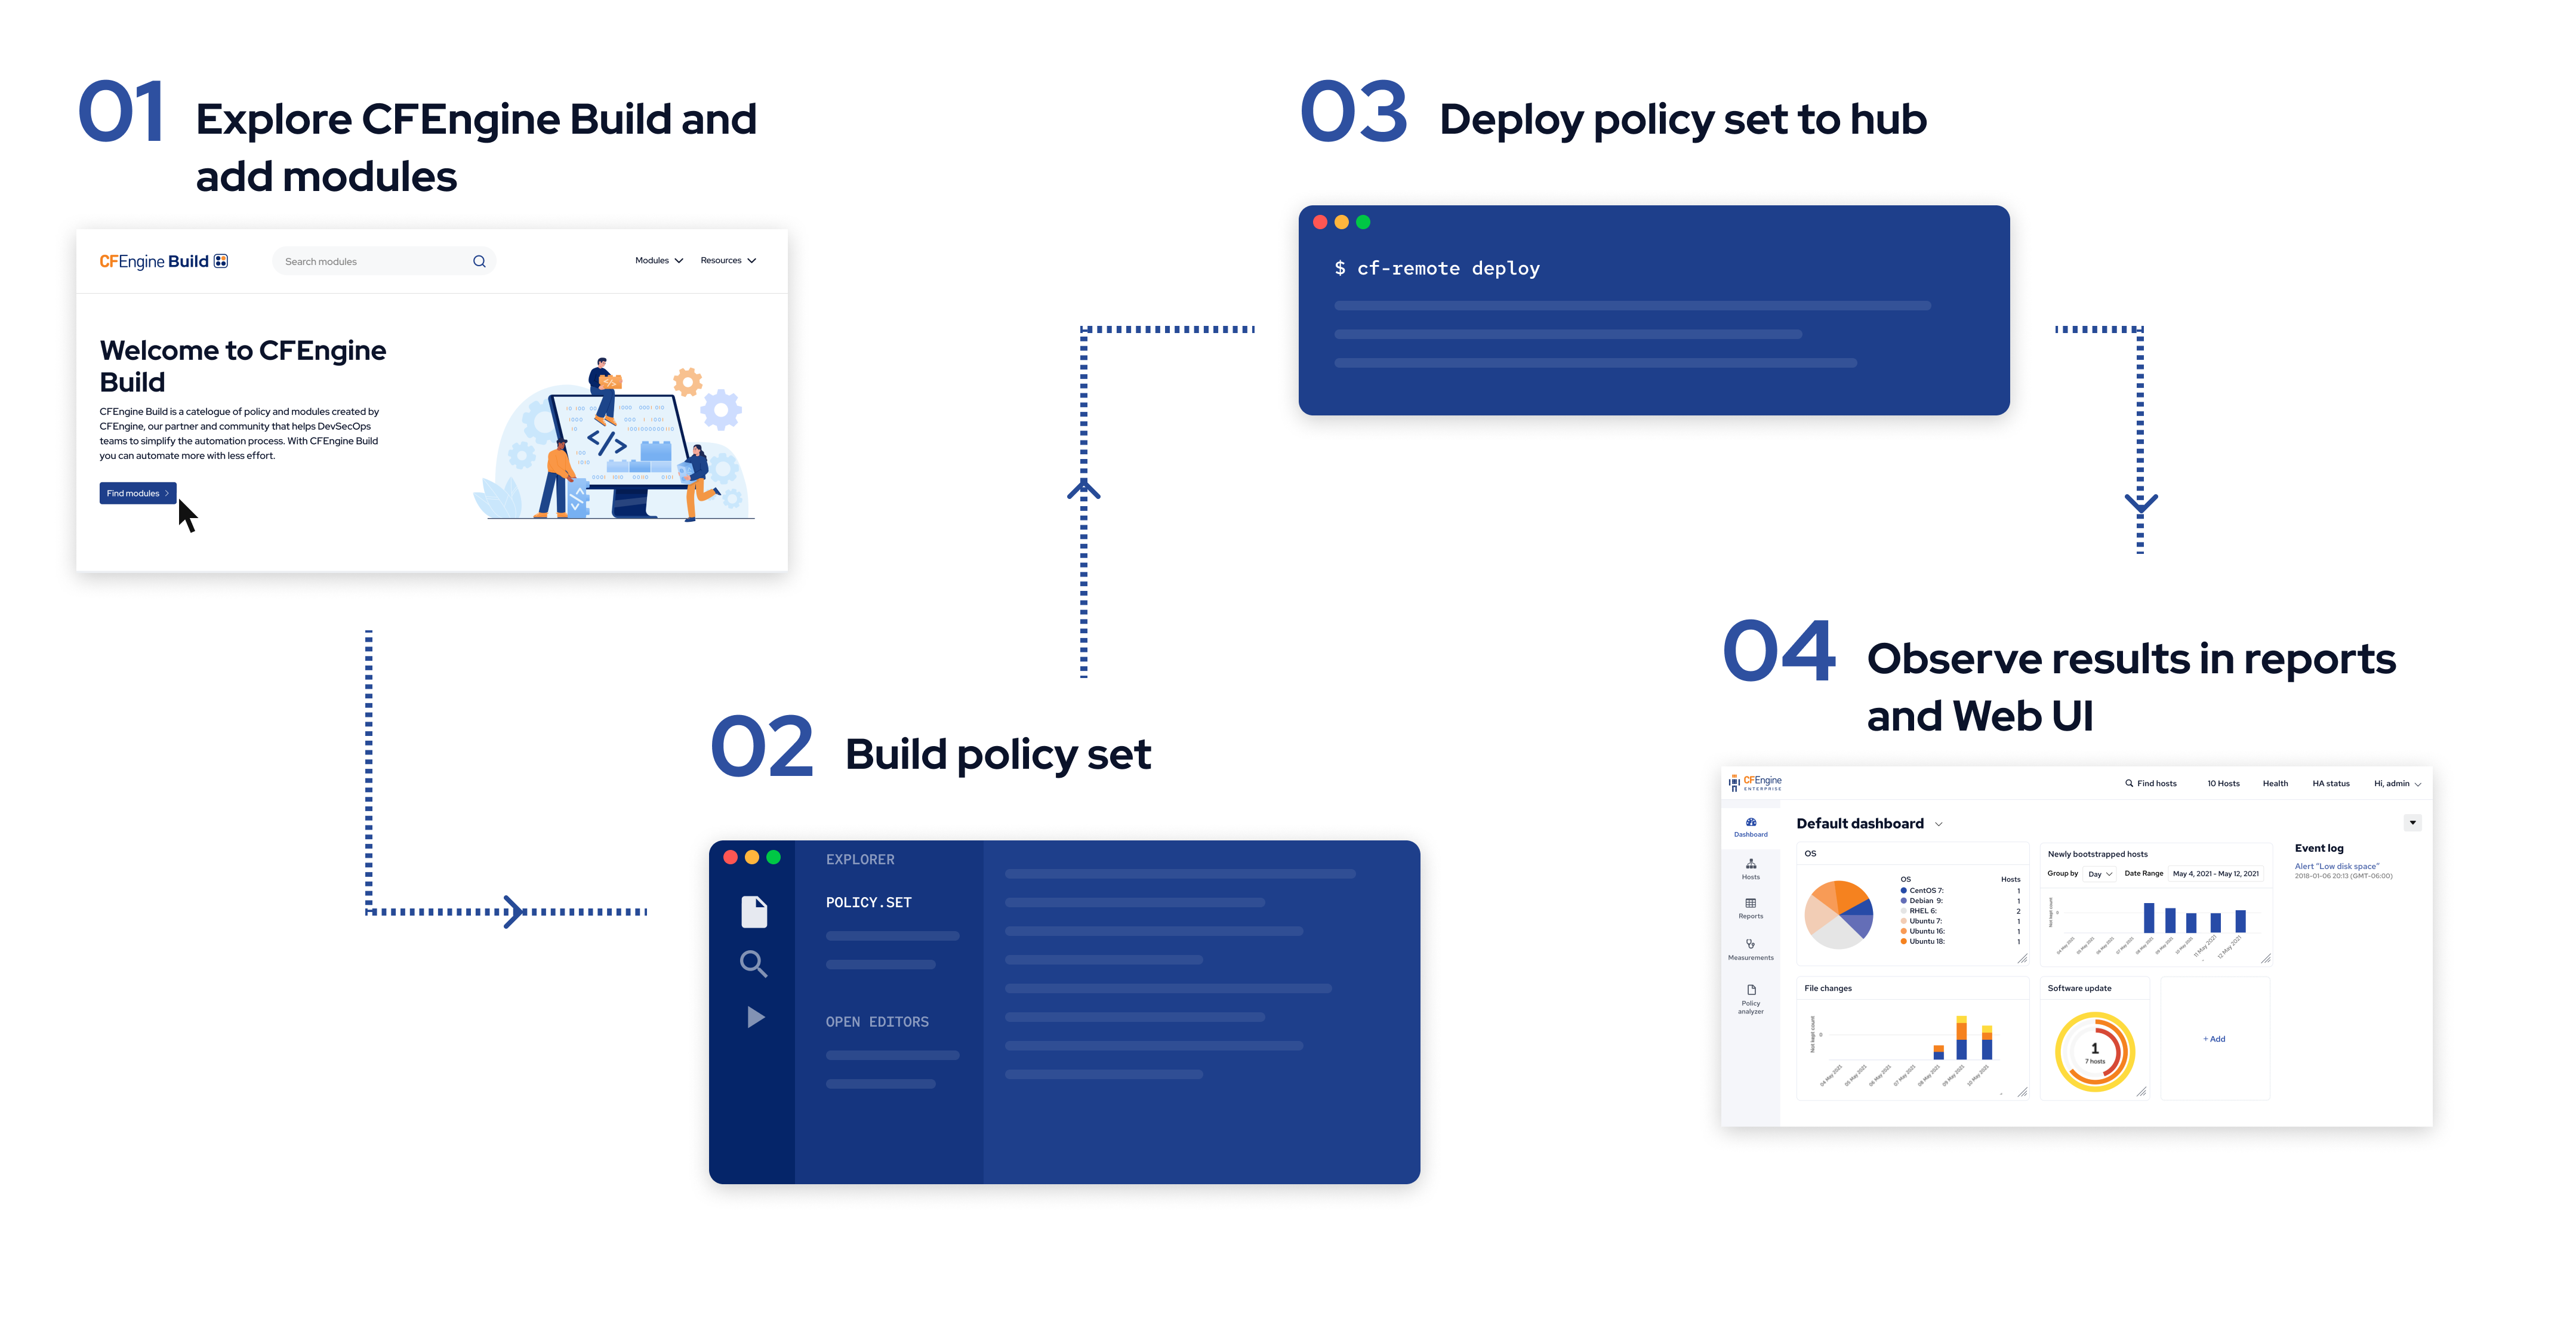
Now that you've installed CFEngine and the tools we need, we can start working with modules from CFEngine Build. The workflow will look like this:
Video
There is a video version of this tutorial available on YouTube:
Step 0: Creating a new project
Create a folder for you project, for example in your home directory:
$ mkdir -p ~/cfengine_project
Initialize it:
$ cd ~/cfengine_project
$ cfbs init
Step 1: Explore and add modules
The first module you should add is masterfiles.
This is the default policy which is included in the CFEngine packages, so it is already running on your hub.
Use this command to add it to your project:
$ cfbs add masterfiles
At this point, you can go to build.cfengine.com and find modules you would like to use.
The command to add them is the same as you just ran to add masterfiles.
For the purposes of this tutorial, let's add the git module so we can work with git repositories later:
$ cfbs add git
Additionally, let's add a module to make CFEngine run policy and report collection every minute instead of the default 5 minute interval:
$ cfbs add every-minute
Finally, let's add a report for whether the OS is supported by the OS vendor:
$ cfbs add compliance-report-os-is-vendor-supported
Step 2: Build
Once we are done adding modules, it is time to build them, combining it all into the policy set which will be deployed to our hub:
$ cfbs build

Modules:
001 masterfiles                              @ f3a8f65e77428a6ab9d62c34057a7ace6ae54ce9 (Downloaded)
002 library-for-promise-types-in-python      @ c3b7329b240cf7ad062a0a64ee8b607af2cb912a (Downloaded)
003 promise-type-git                         @ c3b7329b240cf7ad062a0a64ee8b607af2cb912a (Downloaded)
004 every-minute                             @ 05bf5e5b1c014018a7b93a524e035c1a21bcffa4 (Downloaded)
005 compliance-report-imports                @ 9d4a1cb1f919454a49baf22469ebc0b1606ae904 (Downloaded)
006 autorun                                  @ c3b7329b240cf7ad062a0a64ee8b607af2cb912a (Downloaded)
007 compliance-report-os-is-vendor-supported @ d9e0aad225535b2b16ba2126e8302f8ffc5e7d38 (Downloaded)

Steps:
001 masterfiles                              : run './prepare.sh -y'
001 masterfiles                              : copy './' 'masterfiles/'
002 library-for-promise-types-in-python      : copy 'cfengine.py' 'masterfiles/modules/promises/'
003 promise-type-git                         : copy 'git.py' 'masterfiles/modules/promises/'
003 promise-type-git                         : append 'enable.cf' 'masterfiles/services/init.cf'
004 every-minute                             : json 'def.json' 'masterfiles/def.json'
005 compliance-report-imports                : copy './compliance-report-imports.cf' 'masterfiles/services/autorun/'
006 autorun                                  : json 'def.json' 'masterfiles/def.json'
007 compliance-report-os-is-vendor-supported : copy './os-is-vendor-supported.json' 'masterfiles/.no-distrib/compliance-report-definitions/os-is-vendor-supported.json'

Generating tarball...

Build complete, ready to deploy 🐿
 -> Directory: out/masterfiles
 -> Tarball:   out/masterfiles.tgz

To install on this machine: sudo cfbs install
To deploy on remote hub(s): cf-remote deploy
Importantly, we see that our policy was built successfully, from 7 different modules.
4 of those are modules we added, and the 3 others were added as dependencies.
The output of the build, the policy set, is available in the out/ directory.
Feel free to look at some of the files in out/masterfiles/, if you want to understand how these modules work.
Step 3: Deploy
Now, let's deploy what we built to the hub:
$ cf-remote deploy
Note: This assumes your hub is saved in cf-remote, with the group name hub.
We did this in the first part of the series, while installing CFEngine, but if you haven't you can do it like this:
$ cf-remote save -H root@192.168.56.2 --role hub --name hub
(Replace SSH username and IP with what works on your hub).
Step 4: Observe
Open your web browser and enter the IP address of your hub in the address bar to go the Mission Portal web UI. For example:
(Log in with username admin and password admin, or whatever you changed it to when you first logged into your hub).
By clicking on Reports and Compliance we can see the report we added, OS is vendor supported:
(Reports in CFEngine Mission Portal can be saved as PDF or CSV or scheduled to be sent to your email periodically).
What's next
Now that you've successfully added modules and seen the results in Mission Portal, you're ready to look for more modules, or explore Mission Portal further. Here are some examples of modules you might be interested in:
- Scan and report on potentially vulnerable log4j installations
- Inventory (reporting) data of who can use sudo on each host
- Promise type to perform HTTP requests
To add more modules, just repeat the commands from steps 1-3, for example:
$ cfbs add inventory-sudoers
$ cfbs build
$ cf-remote deploy
In the next tutorial we will look more at the reporting and Web UI, called Mission Portal: