Get Started Guide for CFEngine 3 Enterprise 2.2
Updated 29. May 2012
Igniting CFEngine 3 Enterprise!
COMPLETE TABLE OF CONTENTS
Summary of contents
1 Introduction
1.1 CFEngine 3 Enterprise - the new CFEngine 3 Nova!
CFEngine 3 Enterprise 2.2 is the next generation of CFEngine 3 Nova (successor of CFEngine 3 Nova 2.1.3), upgraded with productivity and performance enhancements. We have made a new Mission Portal Engineering room tailored to the needs of infrastructure engineers, making it both easier and more powerful to use. Most notably we have introduced dynamic grouping of hosts through a flexible tree control, also referred to as the Navigation Tree. It allows system adminsitrators to flexibly group hosts based on CFEngine classes, both discovered (hard classes such as operating system, architecture, IP address, etc.) and user defined (soft classes such as webserver, development, staging, etc).
CFEngine 3 Nova is compatible with CFEngine 3 Enterprise and can easily be upgraded by following the instructions in the CFEngine 3 Enterprise Owner's Manual.
The launch of CFEngine 3 Enterprise also brings a new offering: CFEngine 3 Free Enterprise, our commercial enterprise product offered for free for up to 25 managed hosts. It differs from our commercial offer in that it has different licensing terms, different support and it is limited to a maximum of 25 hosts. The product is described in full detail at http://cfengine.com/25free.
1.2 About CFEngine 3 Enterprise
CFEngine 3 Enterprise is a commercially licensed version of the core CFEngine
software1 with enterprise library extensions. All of
the documentation for CFEngine 3 applies to CFEngine 3 Enterprise.
The aim of CFEngine 3 Enterprise is to offer a knowledge-enhanced framework for configuration man-
agement that goes beyond mere technical configuration to support the needs of businesses. Features
include compliance management, reporting and business integration, and tools for handling necessary
complexity. CFEngine 3 Enterprise has features to support Cloud Computing for public and private clouds, as
well as greater integration facilities with database resources.
2 Installing CFEngine 3 Enterprise
2.1 Installation procedure
CFEngine 3 Enterprise is designed to be simple to install in its default configuration. The installation
process has three phases:
- Unpacking the software.
- For commercial customers: Obtaining a license. CFEngine 3 Free Enterprise users can use the product without a license file (provided they have accepted the licensing terms, see also http://cfengine.com/25free).
- Adapting policy.
You should start from a blank system. If you have been using CFEngine Community Edition and you have
already developed a policy, set aside this policy during the installation process. You will be able
to integrate it back later.
CFEngine 3 Enterprise is provided in two packages, cfengine-nova and
cfengine-nova-expansion. The main software package
must be installed on every host (including the hub). The expansion package is only installed on the policy hub. You should install and set up the hub first.
- Verify that the machine's network connection is working. On the hub, verify that package managers
yum,
zypper or apt-get are working (e.g. apt-get update).
- Copy the CFEngine 3 Enterprise packages to the system.
On the hub (policy server):
          cfengine-nova_2.2.xxx.[rpm|deb]
          cfengine-nova-expansion_2.2.xxx.[rpm|deb]
On all other machines:
cfengine-nova_2.2.xxx.[rpm|deb]
- Unpack the software:
- Red Hat family
-
host# rpm -ihv packages
- SUSE family
-
host# rpm -ihv packages
- Debian family
-
host# dpkg --install packages
- On the hub, a public key has now been created in /var/cfengine/ppkeys/localhost.pub as part of the
package installation.
- CFEngine 3 Enterprise 25 free users: You do not not need to do anything in regard to this step.
- Commercial CFEngine 3 Enterprise customers: You should send this public key to CFEngine Support2 as an attachment in the ticket system, to obtain a license file license.dat.
|
Save the returned license file to /var/cfengine/masterfiles/license.dat
on the hub before continuing.
|
- The remaining steps apply to all hosts, but you should install the hub or policy server first. For large systems (> 1000 hosts) we recommend increasing the memory limit in php.ini on the hub (for instance to 128 MB).
Find the hostname or IP address of the hub (policy server), here we assume ‘123.456.789.123’ is the address.
hub # /var/cfengine/bin/cf-agent --bootstrap --policy-server 123.456.789.123
Use the same command on all hosts, i.e. *** do not bootstrap the policy server with a localhost address ***
If you mistype the address of the hub, we recommend doing the following steps to re-boostrap:
      hub # /var/cfengine/bin/cf-agent --bootstrap --policy-server 123.456.789.124
      hub # killall cf-execd cf-serverd cf-monitord cf-hub
      hub # rm -rf /var/cfengine/inputs/*
      hub # rm -f /var/cfengine/policy_server.dat
      hub # /var/cfengine/bin/cf-agent --bootstrap --policy-server 123.456.789.123
CFEngine will output diagnostic information upon bootstrap. Error messages will be displayed if bootstrapping failed, pursue these to get an indication of what went wrong and correct accordingly. If all is well you should see the following in the output:
-> Bootstrap to 123.456.789.123 completed successfully
- CFEngine should now be up and running on your system. It will copy its default policy files into masterfiles on the hub (policy server). When the clients are bootstrapped, they will contact the hub and copy them to their inputs directory.
- Commercial CFEngine 3 Enterprise customers: To complete licensing setup, you should make a promise to accept the license
terms by editing /var/cfengine/masterfiles/promises.cf
on the hub (policy server), changing the line ‘host_licenses_paid => "<NUMBER>";’
in ‘body common control’ to reflect the correct number of licenses that you have subscribed to.
How to assess success in this procedure:
- Look at the process list on the systems with ‘ps waux | grep cf-’.
You should be able to see
cf-execd running, and eventually other processes from
the CFEngine suite like cf-monitord cf-serverd. On the hub, you should
also eventually see cf-hub. Note that it may take 5–10 minutes before all the
processes get started.
- Look for files in /var/cfengine/inputs (Unix)
or C:\Program Files\Cfengine\inputs (Windows). The license
file will be copied out from the policy server to the clients as part
of the normal distribution of policy. If you have obtained a license file (see step 4 above), each machine should get a
copy of the license.dat file in /var/cfengine/inputs
(Unix) or C:\Program Files\Cfengine\inputs (Windows).
- On the hub, the file /var/cfengine/promise_knowledge.cf should have been
created, and should contain data.
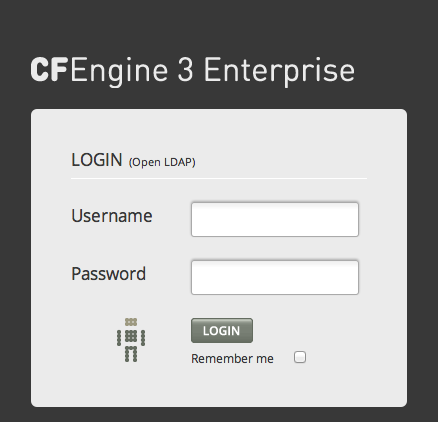
- Finally, try to connect to the web server at port 80 on the hub/policy host (for example at http://123.456.789.123).
You should see a login page like the one shown in the figure below:
Figure: Mission Portal login screen
Default user name and password is 'admin' and 'admin' (make sure to change this at first login to prevent unauthorized access).
Note that some of the displays in the Mission Portal may be blank when you log in just after installation; some reports and graphs are only updated every six hours. It may also take some time for the system to fully converge, do not get troubled if initially there are some promises repaired or not kept.
Please refer to the CFEngine 3 Enterprise Owner's Manual
(http://www.cfengine.com/manuals/Enterprise-2-2-OwnersManual) for complete information and help troubleshooting your installation.
3 Mission Portal
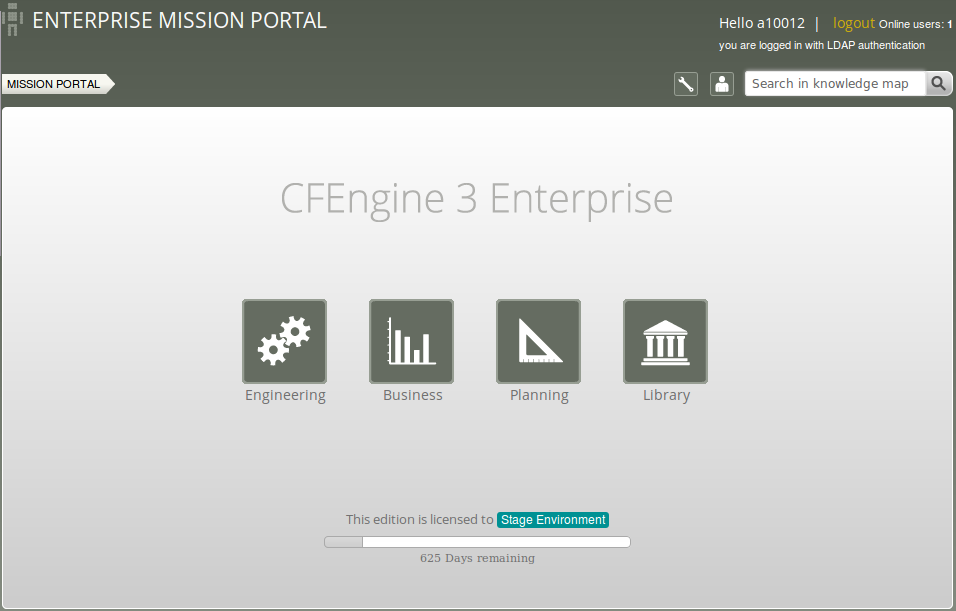
The Mission Portal is the centerpiece
of user interaction with CFEngine 3 Enterprise. It can be accessed by connecting to the hub (policy server) with your web browser (for example at http://123.456.789.123; default port 80). From here you can get a complete overview of operations and performance, business and compliance, organizational knowledge and library. We will make a quick introduction of the four main rooms in the Mission Portal, please refer to the CFEngine 3 Enterprise Owner's Manual for a complete overview.
Figure: The Mission Portal
3.1 Mission Portal Rooms
There are four main rooms in the Mission Portal that offer insight into different aspects of operations:
- Mission Engineering: a place to see the current state of system repair
- Mission Business: a top level overview of compliance status and business value
- Mission Planning: a place to plan and make policy changes
- Mission Library: a knowledge bank that connects information together
Each of these rooms is a beginning from which you can refine your overview and search
through information.
3.1.1 Mission Engineering
Mission Engineering illustrates the state of the system in relation to the desired state at all scales. Zoom in to specific areas and examine the impact of promises, query data, and extract reports.
The Mission Engineering room underwent a substantial rework for the release of CFEngine 3 Enterprise 2.2. Most notably we introduced a host Navigation Tree where hosts can be grouped and organized in a hierarchy defined by classes. The remaining content on the page is influenced by the selected tree context, i.e. the Status and Reports tabs will only show information for linux hosts if such a context/node is selected in the the tree (the active node is highlighted to show that it is selected). Another notable change is the new interface to interact with reports, now available as a tab and drop-down menus.
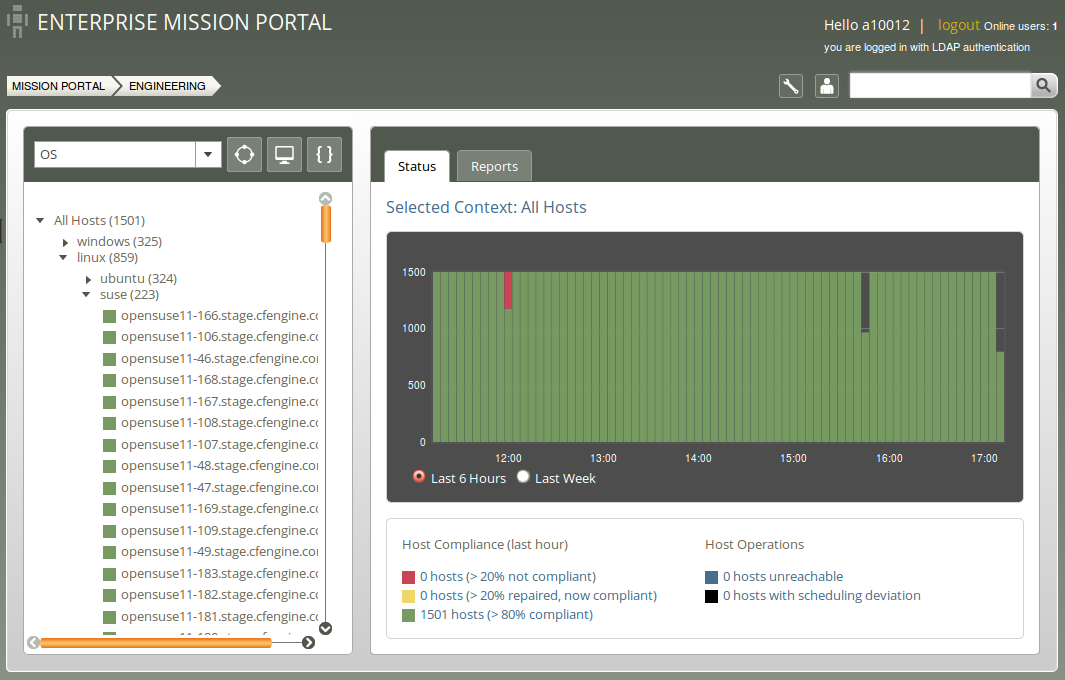
Figure: Mission Engineering
3.1.1.1 Navigation Tree
The Navigation Tree consists of two main parts:
- Top menu:
Figure: Top Menu
- The Tree Selector: Dropdown menu; choose between the default tree and custom trees defined by the user. Each tree can have a different subset of nodes. Click
Add in the dropdown menu to add your own tree (input the name of the new tree in the field next to the add button). Click X next to a tree name to delete it.
- Class finder, Host finder and Promise finder to explore classes, hosts/IP-addresses or promises, respectively.
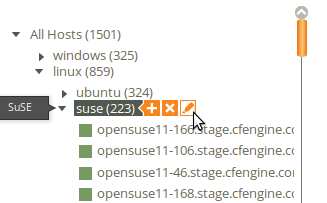
- The tree itself, grouped by classes. The user can add up to four sublevels in the Navigation Tree and edit or delete existing nodes.
Figure: Navigation Tree
- To add a node:
- Put the mouse pointer over the node you wish to add a sublevel to, click the plus sign shown beside the node.
- A pop-up appears with fields to enter a label (name) to the node that you wish to create and the class expression you wish to filter by. The class expression field contains a button which opens a class finder to help you select classes.
- To delete a node: Put the mouse pointer over the node that you wish to delete, click the
X shown beside the node.
- To edit a node:
- Put the mouse pointer over the node that you wish to edit, click the
Pencil icon shown beside the node.
- A pop-up appears where you can edit the fields that you wish to change.
The trees and nodes that a user creates will not be visible to other users of the Mission Portal.
Click on any host in the tree to get a quick overview of that host in the status tab. Click the host name under the compliance graph to see more detailed information about the host.
3.1.1.2 Status tab
The Status tab shows the overall status of the hosts selected in the Navigation Tree. This section contains:
- Selected context: Shows the context (combination of selected classes) for which the data is valid.
- Compliance Summary: The row of bars shows the compliance of all registered hosts in blocks of five minutes for the last six hours or for the last week (depending on which is selected at the bottom of the graph)3. The hosts are classified into red, yellow and green according to the status of their compliance (see below). The height of a bar corresponds to the number of registered hosts. Note that the last column may have a lower height than the others (i.e. show information for fewer hosts)4. Click on a bar to see which promises were repaired or not kept.
- Host Compliance (last hour): The hosts are classified into red, yellow and green according to the status of their compliance over the last hour:
- A host is red if more than 20% of its promises are not kept
- A host is yellow if 20% or more of its promises were repaired and host is now compliant (> 20% repaired, now compliant)
- A host is green if more than 80% of its promises are kept (> 80% compliant)
- Host Operations: The hosts are classified into blue and black according to their operational status.
- A host is blue if there has not been any contact between the hub and the client within a set time interval (host unreachable; default value is set to 15 minutes).
- A host is black if CFEngine's scheduling daemon,
execd, is not running (the hub will still able to contact the client to collect reports but the client will return stale data since it has not been running at regular intervals).
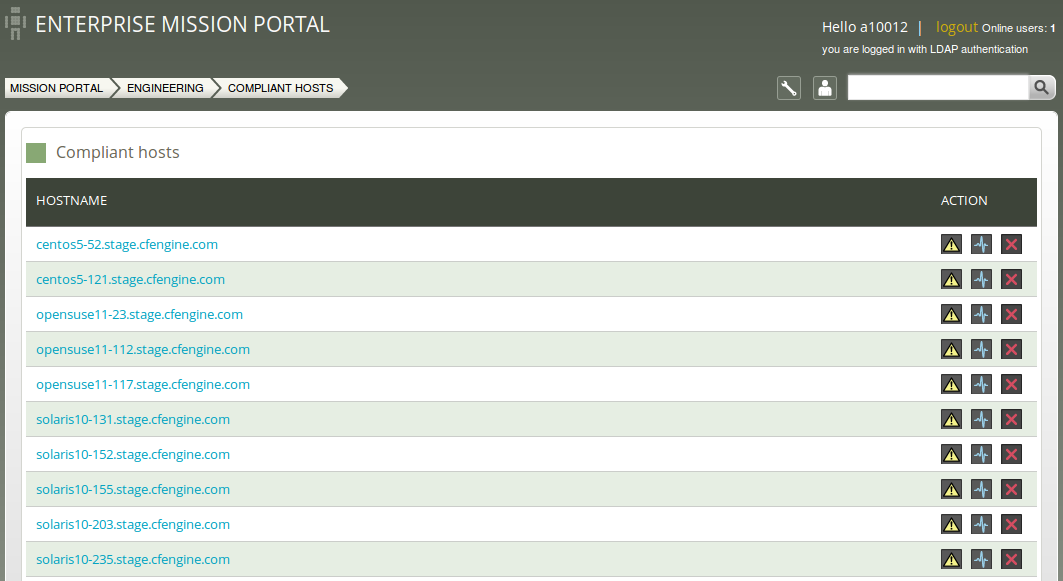
- Clicking a link in any of the above categories (red/yellow/green/blue/black) produces a list of the hosts in that category (in the above mentioned context).
Figure: Compliant hosts
Action icons:
- Yellow warning triangle: View the promises not kept on this host
- Pulse line: View vitals signs (statistics) on this host
- Red X: Delete this host (host will be deleted from database, but may re-appear if CFEngine is still running on it; see footnote below).5
3.1.1.3 Reports tab
Reports are sorted into five main categories that contain drop down menus to select default reports. Clicking a report will bring up a search filter specific to that report.
Figure: Reports tab
Reports are updated at different intervals, the default values are every 5 minutes or every 6 hours (this can be changed by the user). Below is a list of standard reports, updated every 5 minutes unless otherwise noted:
- Policy
- Compliance by bundle: Status of promise bundles and when they were last verified
- Compliance by promise: Compliance of each promise individually
- Promises repaired log: Log of actual repairs made to the system
- Promises repaired summary: Cumulative (histogram) summary of promises repaired
- Promises not kept log: Log of promises that could not or would not be kept
- Promises not kept summary: Cumulative (histogram) summary of promises not kept
- Accounting
- Compliance summary: Total summary of host compliance
- Business value report: Accumulated value of promises kept (6 hrs)
- Benchmarks: Execution time used to verify selected promises
- System
- Context classes: User defined classes observed on the system
- Last saw neighbours: Log of when neighboring hosts were last observed online
- Variables: Table of variable values last observed (6 hrs)
- Software
- Patches available: A list of patches currently claimed to be available by the local package manager
- Patch installed: A list of (un)applied patches according to the local package manager
- Installed: List of software packages claimed to be installed according to the local package manager
- File watch
- Change summary: Log of all detected changes to files from changes promises
- Text changes: Delta/difference comparison showing file changes
- Setuid: Current list of observed setuid/setgid root programs (6 hrs)
3.1.2 Mission Business
Mission status is a high level summary of how well the entire system is behaving.
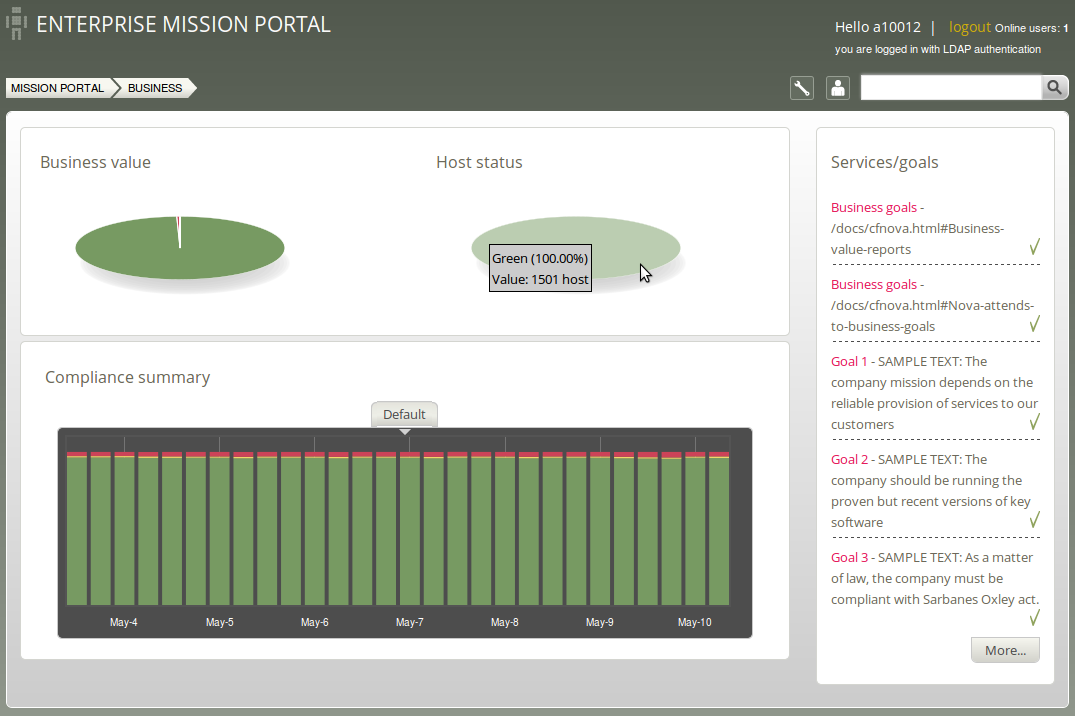
Figure: The status of IT operations.
Business Value and Host Status:
The two pie charts show the business value of the promises kept/not kept and well as host status, respectively. Business value is associated with the value of promises as defined in policy files. In the Host Status chart, each host represents a slice of the pie and is classified into red, yellow, green and blue according to the level of their compliance. A host is red if less than 80% of its promises are kept, yellow if 20% or more of its promises were repaired and host is now compliant, green if more than 80% of its promises are kept, and blue if there is no contact between the hub and the client host.
Compliance Summary:
The row of bar meters shows the compliance (average percentage of promises kept, repaired or not kept) of all registered hosts 6 in blocks of 6 hours for the past week. It summarizes performance and anomalous behavior in a simple red (promises not kept), yellow (promises repaired) and green (promises kept) scale. Click on a bar to see which promises were kept/not kept.
Services/Goals:
A summary of Mission goals (as defined in user policy files). See the CFEngine 3 Enterprise Owners Manual for more information.
3.1.3 Mission Planning
Make changes to policies, goals determined by promises and implement specific tactics to achieve the desired state. Interact with data, approve changes and anomalies. Get an overview of users logged on to the Mission Portal, as well as their current activity.
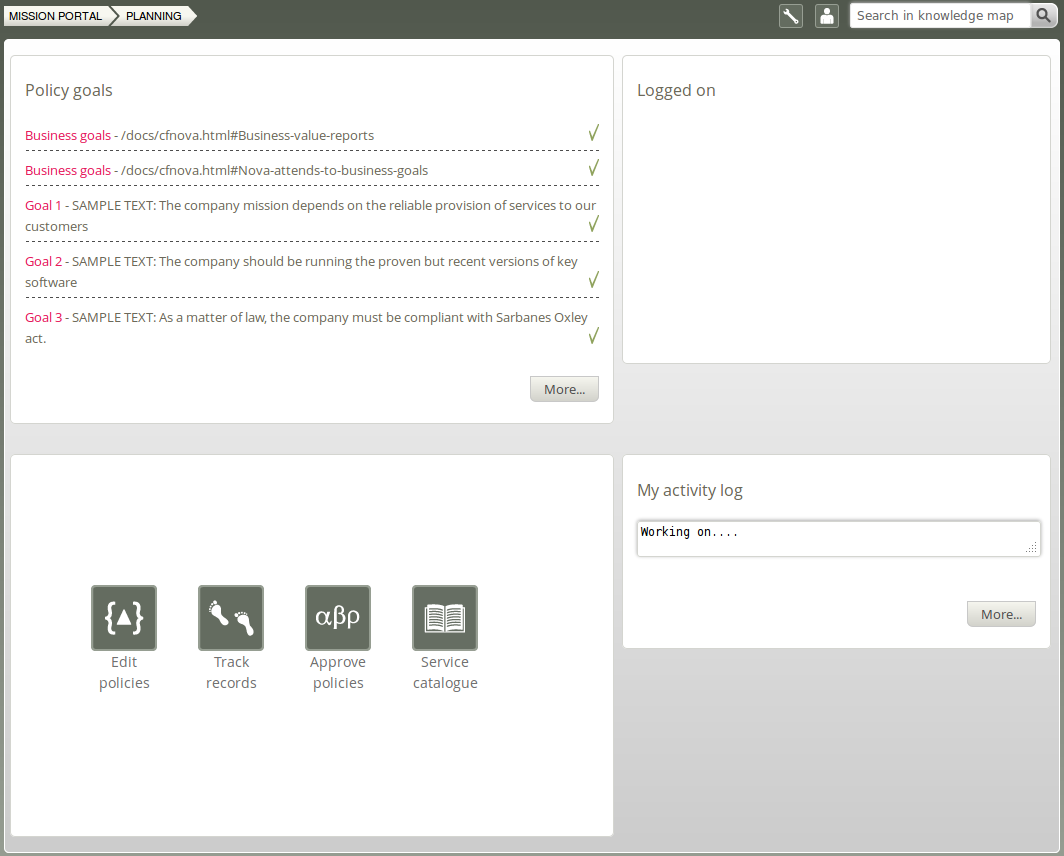
Figure: Mission Planning
Policy Goals:
List of policy goals as defined in policy files; these examples are from company_knowledge.cf. Edit the file in the policy editor (Edit policies button) or edit the file in your own text editor. The "More..." button links to the Service Catalogue, click to see which bundles contribute to these policy goals.
Action buttons:
- Edit policies: Edit policy files in the integrated policy editor (requires Subversion)
- Track records: Overview of promises repaired or not kept
- Approve policies: Give your approval of a submitted policy file
- Service catalogue: See which bundles contribute to policy goals
Logged on:
Shows users currently logged on to the Mission Portal and their activity.
Activity log:
Shows the latest activity entries. Type in a new activity to keep colleagues posted on current work.
3.1.4 Mission Library
The Library contains finders for documents, topics, a notes archive, and (external) link to the CFEngine community.
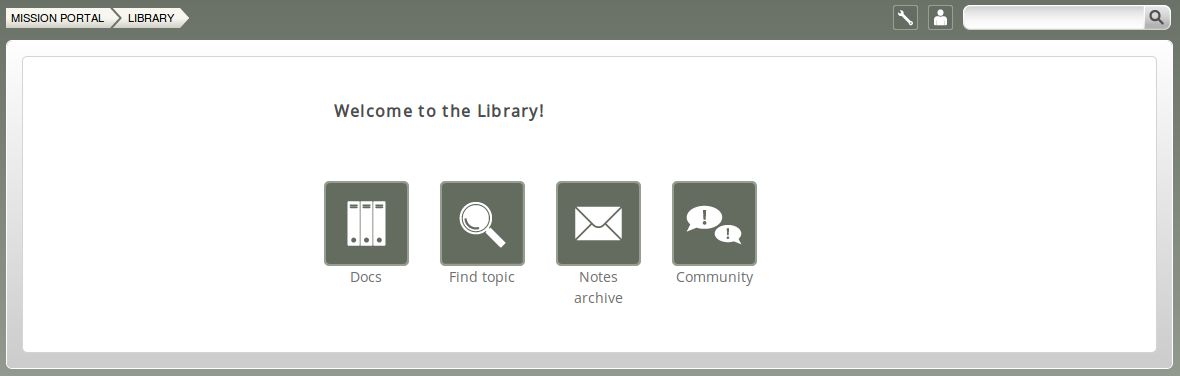
Figure: Mission Library
Library buttons:
- Docs: Overview of documentation that was packaged with CFEngine 3 Enterprise.
- Find Topic: Search for topics either by scrolling through the alphabetical list or by typing in the search box (same as the search box on top right of page).
- Notes Archive: Get overview of all notes made in regard to hosts or reports.
- Community: External link to the CFEngine community
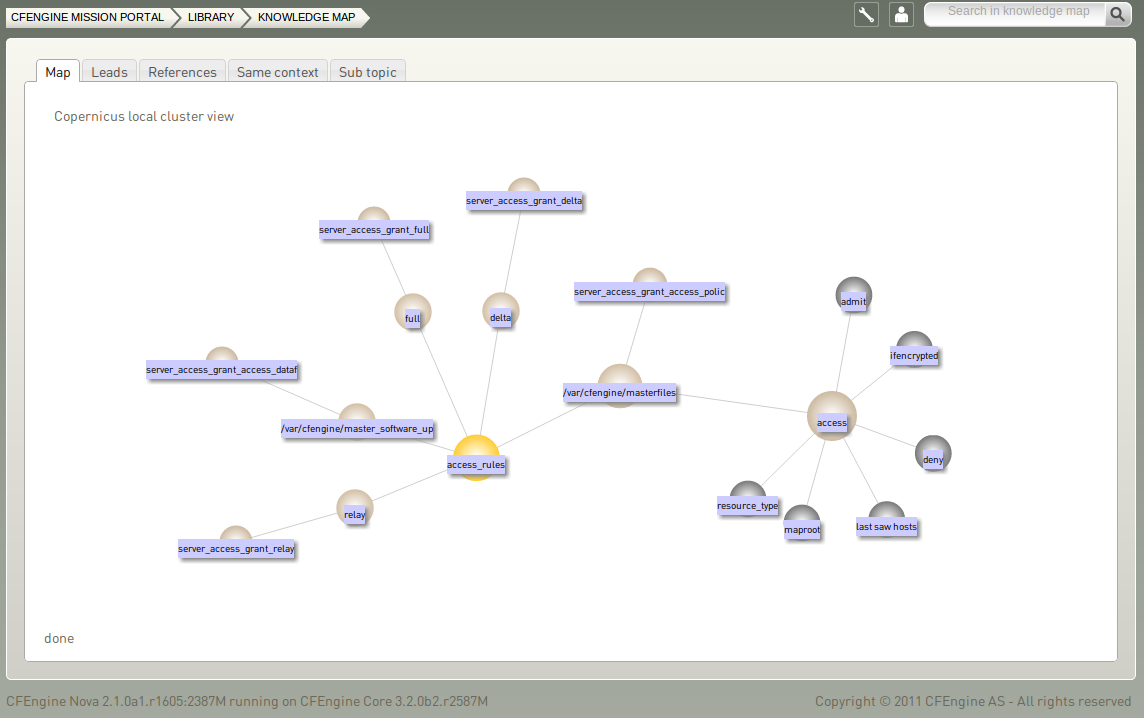
3.1.4.1 Topics viewer (Knowledge map)
The Topics viewer, or Knowledge map, is a sematic web of subject references and document pointers. In a semantic web, you are presented with links to
documents about your chosen topic. In addition you are
offered leads and possible pathways to topics that are known to be
related. These leads don't just point you to more documents, but
explain how neighboring issues are related. The aim is to help
the user learn from the experience of browsing, by conveying the
meaning of the current topic in relation to other issues in the
system. This is how knowledge transfer occurs.
The Knowledge Map can be found by searching for a topic in the top right corner or through the topic finder in the Mission Library (this will sometimes also lead directly to a document or web page instead).
Figure: Topics viewer (Knowledge map)
The yellow sphere represents the current topic, surrounding (blue) spheres represent related topics, and the size of the spheres represents the number of associations each topic has. This map is navigable: click on a different topic to see a new view centered on that topic and its associations. The tabs will show leads, references, topics in the same context, and sub topics in the same context. Links can also lead to other viewers in the Mission Portal, documents and web pages related to the current topic.
4 Next steps
Please refer to the CFEngine 3 Enterprise Owner's Manual for complete information about this product. You may also wish to visit our getting started section on cfengine.com: